Slothmograph
 Philip Sloth



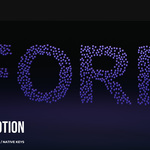
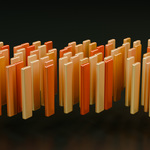
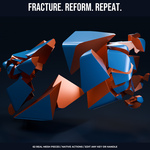
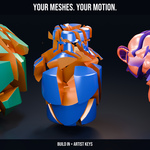
One download: addon and PDF manuals
Download slothmograph_v1.2.2.zip from your Superhive purchase downloads. Install this ZIP directly in Blender; no outer bundle or nested installer needs to be unpacked. The addon and five searchable PDF manuals are together, with linked contents and bookmarks: 166 pages covering setup, artist workflows, registered controls, troubleshooting and release changes.
Read the PDFs in blender_mograph/documentation/PDF. For offline browser navigation, extract the blender_mograph/documentation folder and open START_HERE.html. The addon does not need this extraction to install. Browser-readable HTML and the original Markdown guides are included.
- 01_Quickstart.pdf (7 pages): install the addon, make a first shot, animate 1,000 discs between grayscale images and find Layout Transition in Motion Studio.
- 02_Artist_Guide.pdf (23 pages): choose a workflow, use presets, direct timing and native animation, revise a shot and prepare delivery.
- 03_Control_Reference.pdf (122 pages): search the registered properties, defaults, ranges and choices. Internal saved-state entries are identified; a registered property is not necessarily a visible or continuously animatable control.
- 04_Troubleshooting.pdf (7 pages): diagnose symptoms and recover a setup.
- 05_Changelog.pdf (7 pages): read release changes and compatibility notes.
Install and update
Use Install in Blender 4.1 or Install from Disk in later builds, select the original addon ZIP, enable SlothMograph and open its N-panel tab. For an existing install, save a project backup, remove the old SlothMograph addon in Preferences, install this ZIP and restart Blender. Blender can retain obsolete bundled files during an overwrite; Remove clears those files without deleting your saved projects.
The download keeps the built-in preset and material libraries. Optional demo scenes and showcase projects are not bundled. The marketplace animations demonstrate actual addon output with additional artist modeling, materials, lighting and camera design.
Keep control of your shot
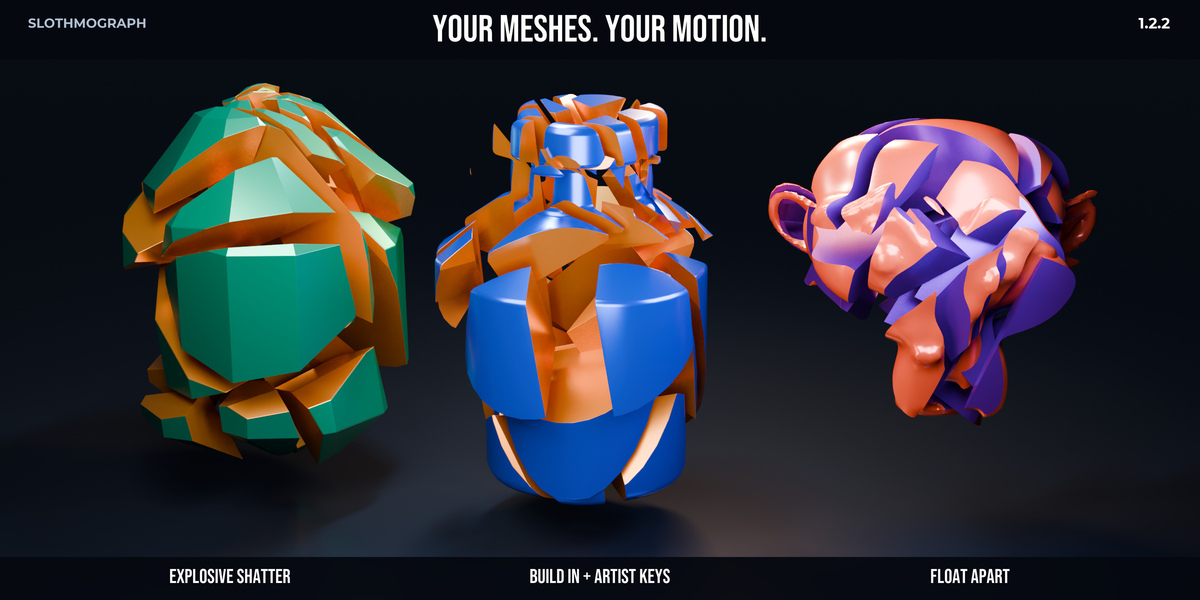
Presets are editable starting points. Inspect native Actions and keys in the Graph Editor, refine holds and return timing, and preserve an authored take before applying another preset or rebuilding. The image-motion demonstrations use artist-adjusted endpoint correspondence; endpoint spacing is not general collision avoidance. For fracture, prepare the source mesh and inspect its pieces before animating. Read the User Guide for source, sampling and native-handoff limits.
Quickstart
SlothMograph Quickstart
One download: addon and PDF manuals
Install slothmograph_v1.2.2.zip directly from Blender Preferences. The ZIP contains the addon and the five PDF manuals together. PDF files are in blender_mograph/documentation/PDF. To browse the offline manuals, extract blender_mograph/documentation from the downloaded ZIP and open START_HERE.html. The addon does not need that extraction to install. No demo scenes or showcase projects are bundled. When updating an existing install, save your project, remove the old SlothMograph addon in Preferences, install this ZIP and restart Blender. This clears obsolete bundled files without deleting saved projects.
Image Density: the same 1,000 discs in two image formations
- Create a filled circle disc, select it and choose Create Cloner.
- Choose Image Density in the cloner Mode. Choose the start map in Image A and the target map in Image B.
- Set Count to 1000 and Size to the desired width/height. Brighter pixels receive more points. Invert for dark artwork on a white background. Clones keep their size.
- Set Progress to 0 and insert a keyframe with
Iover the slider. Move to the end frame, set Progress to 1 and insert another keyframe. Play or scrub the timeline. - Choose Spatial pairing to reduce travel. Linear, Smooth and Smoother change the motion timing. Image B may be left empty to hold A.
- Set Min Spacing to at least your disc diameter when endpoint overlap should be avoided. If the pattern cannot fit Count, reduce spacing or enlarge Size; no clones are silently removed. Spacing does not prevent paths crossing during the transition.
- After editing or reloading an image, click Refresh Image Layouts. Pack external images with Blender's Pack Resources before moving the project.
- Enable Hide Original Source in Render to render only the clones. This hides the original disc object; all Count clones remain visible.
Single-source Image Density with no enabled effectors and no transform cache animates Progress natively in Geometry Nodes, including background Blender rendering. With effectors, use Bake for Handoff for an animated background render. The Shader effector remains the tool for brightness-driven displacement of an existing layout.
Open Motion & Travel for direct stagger, order, six easing choices and Straight / Arc / Lift. Timeline & Holds creates editable Progress keys and returning loops. Density & Placement > Separate A / B Settings exposes per-image aspect, levels and mapping. Preview & Delivery generates interpreted previews, suggests endpoint spacing and creates an addon-free native motion copy. The USER_GUIDE explains all controls and error recovery.
This update is tested in Blender 4.1.1, 4.2.3 LTS, 4.3.2, 4.4.0, 4.5.14 LTS and 5.0.1 on Windows. Install slothmograph_v1.2.2.zip from Edit > Preferences > Add-ons > Install from Disk (Install in Blender 4.1), enable it, and open the SlothMograph sidebar (N).
Choose Quickstart in Blender, or open Help & Getting Started, to read the guides without leaving Blender. They open in the Text Editor; press Shift F5 to return to the 3D View. USER_GUIDE.md explains the workflows and TROUBLESHOOTING.md covers symptoms and recovery. Hover controls for their tooltips.
Make a first shot
- Add a cube and select it. Choose Create Cloner.
- Choose Grid, set a modest count such as 6 × 6 × 1, and adjust spacing to suit the cube size.
- Add a Random effector. Adjust position, rotation and strength.
- Add a Sphere field to restrict the effect. Move or resize the field to shape the result.
- Set an effector color mode and apply a cloner color material. Add a camera and light, then render a frame.
Cloner transforms and source transforms both contribute to the result. Keep the source and reference cloner available while experimenting. Duplicate your project before changing an established production setup.
For a curve layout, assign a curve and choose Even Spacing for approximately equal physical distance or Step for equal parameter steps. Curve clones point local +Z along the path; Beads uses local +Y, and Radial uses local +X along its ring tangent. Use an asymmetric source to inspect orientation. Beads keeps complete measured copies within open path ends; enable Loop on a closed path to wrap its offset. These tools place copies; Per-Clone Spline Wrap bends each copy.
An assigned empty target, excessive Volume padding, an exhausted Beads path or complete Start/End trimming can yield zero clones. Restore the target or range before adding effectors. Corrected scatter, spacing and alignment can change an older scene, so compare a saved copy before updating its bake.
If an older clone material renders incorrectly, select its cloner and use Legacy Clone Shaders > Repair Legacy Clone Shaders when that panel appears. The repair makes independent material and node-group copies. New presets already use the corrected attribute reads. Render Instances automatically realizes geometry when the selected shader needs clone geometry attributes.
Animate between layouts
- Select a single-source cloner. In Motion Studio, click Capture A.
- Select the reference cloner, change its distribution or transforms, and keep the same source and clone count.
- Click Capture B, then select the transition result.
- Animate Progress from 0 to 1. Set easing, stagger and order. Optional field influence accepts stateless fields.
- Hide the reference cloner for a clean preview. References remain visible when a result is created.
The transition freezes source geometry. Recapture B to revise its target. Remove the result with the controller's Remove button.
Give every clone a different animation phase
- Animate the cloner's source with shape keys or fixed-topology deformation.
- Select the cloner. Set the source frame range, sampling step and memory budget under Animated Clone Sequencer.
- Create the sequence, then choose playback start, speed, phase step, random phase and playback mode.
- Hide the reference cloner to view the sequence result alone. Scrub the timeline.
Use 2–240 source samples. Changing source topology is rejected. Shared snapshots are saved in the .blend; they do not update automatically after source animation changes. Recreate the sequence to resample.
Bend repeated objects along a path
In Per-Clone Spline Wrap, choose a subdivided mesh source and a curve, then set count and axis. Create the copies and edit spacing, offset or the curve itself. Source subdivision controls bend smoothness. Remove generated copies through their Motion Studio controller.
Layer motion without replacing the base animation
Select an object and open Studio Motion Layers. Add a layer, choose Float, Shake, Turntable or Pulse, set its parameters, and click Apply / Update. Add a second layer to combine movement. Remove one layer independently. Use Blender's NLA Editor to inspect the generated tracks. Keep complex drivers and constraints under review when mixing animation systems.
Share one signal across several properties
- In Shared Signals, add and name a signal.
- Choose a waveform and range. For Audio, select a supported audio file and set frequency range, gate, attack and release.
- Add a target. Choose Object, Object Data, Material Nodes or Node Group, then specify a numeric Blender data path and array index.
- For an object location example, use
locationand index2for Z. Set gain, offset and inversion as needed. Procedural waves also support per-target phase; Audio uses its source-level start offset. - Add more targets and click Apply / Update. Changes are applied explicitly.
- Bake / Detach retains native animation. Remove the mapping to remove its generated contribution instead.
Output is additive. Use Blender's Copy Data Path to obtain paths for modifiers or shader sockets. Check the starting property value before choosing signal amplitude. This panel is intended for artists comfortable with Blender property paths.
Full scene copies can update signals independently. For linked scene copies that share the animation host, make the target independent or edit the original binding; conflicting updates are rejected.
For a single channel, the separate right-click SlothSignal command also creates sampled native NLA animation. No Loop uses one time window; Loop and Ping-Pong repeat through the scene end set when applied, within the repetition limit. Click its Refresh icon after changing a sampled field mask or extending the shot. A field mask uses a cloner as Field Owner; Field Index counts all fields across its effectors from 0. Verify the displayed field name before refreshing.
Edit fields and clone selections
Select a cloner and use Studio Editing. Click, box and lasso select projected clone centers through geometry; Shift adds, Ctrl subtracts, and Escape cancels. Enable highlights to inspect the selection. Field samples report the sampled field value at displayed positions, not the complete stack's final influence.
Select a field in the existing effector panel to expose its modifier stack in Studio Editing. Move, duplicate or copy modifiers. Append Copied Stack adds the copied modifiers after the destination's current stack.
Revise animated type
Change MoText text or font as usual. Unambiguously matched character, word or line parts keep their materials and animation. Unmatched or ambiguous old parts and changes of split mode are archived in a hidden Outliner collection. Check the status message for complex animation that needs review. The archive makes earlier parts recoverable; it is not automatically discarded.
Save and reuse a setup
Use Effector Stack Export/Import for settings-only JSON and L-system Rule Export/Import for grammars. Use My Setups for a supported complete setup with its object dependencies. Invalid preset files leave the existing settings intact; see USER_GUIDE for the formats and limits.
Make the setup root active, select any additional objects intended for the library, and click Save My Setup in My Setups. The library includes the active root, all selected objects and supported dependencies; deselect unrelated objects first. Enter the name, category and description in the file browser, then save a .blend library. Relevant current-scene Shared Signal settings and targets travel with the setup. Load the file to create a separate setup with independent signal bindings and its saved native animation. Choose a replacement mesh to update an initialized single-source cloner while keeping its settings. Unsupported external-media paths, including raw Shared Signal audio paths, are rejected; supported native image, font and sound IDs are embedded.
Use local dependencies; linked-library data and overrides are rejected. Append validates exactly one supported setup root and preserves the existing scene if the library is invalid. Native .blend files still follow Blender's own script and driver trust settings.
Freeze and reopen motion
- Bake the cloner cache over a modest frame range.
- In Persistent Cache, save a
.smcachefile beside the project. - Enable Restore Saved Cache on Open and save the
.blend. - Reopen the project and inspect the cache status. If the structure changed, clear or rebake.
Cached clone transforms and colors stay frozen until you clear or rebake; source geometry and source/snapshot selection remain live. A failed bake or invalid cache import retains the good cache. Copy the cache file with the project when sharing it. Save/Load records an absolute path: after moving files, use Load .smcache at the new location, or set Cache File to a Blender project-relative path such as //shot.smcache and save the .blend.
Deliver native Blender output
Set the scene frame range, choose the handoff mode in Persistent Cache, and run Bake for Handoff. Auto uses transform/color keys for simple single-source output; complex multi-source or material-cycling output uses native frame meshes. Select Geometry Sequence explicitly for changing topology. Inspect SlothMograph_Handoff_Bake and the handoff manifest.
Save a delivery copy, collect external assets, then reopen and render it with the addon disabled. Native frame meshes use stepped visibility and more storage. Verify integer-frame playback; subframe motion blur and cross-DCC export may differ.
Check the shot
In Shot Framing Check, select the camera and subject, choose a frame range, step and safe margin, and run the check. Open SlothMograph Shot Check in the Text Editor for the report. It tests evaluated bounding-box framing, so review occlusion, focus, lighting and composition yourself.
For the complete feature inventory and limits, read README.md. Support: [email protected].
Full User Guide
htmlSlothMograph 1.2.2 — USER_GUIDEbody{margin:0;background:#f4f6f8;color:#17212d;font:16px/1.65 system-ui,sans-serif}main{max-width:960px;margin:0 auto;padding:48px 24px 96px}nav{display:flex;gap:18px;flex-wrap:wrap;border-bottom:1px solid #ccd5df;padding:0 0 18px}a{color:#0057a6;cursor:pointer;text-underline-offset:3px}a:hover{color:#a83d10}a:active{color:#6b2468}a:focus-visible{outline:3px solid #0057a6;outline-offset:4px}h1,h2,h3{line-height:1.2;color:#071421}h1{font-size:38px}h2{margin-top:48px;border-top:1px solid #d1dbe4;padding-top:24px}code{background:#e4eaf0;padding:2px 5px;border-radius:3px}pre{overflow:auto;background:#e4eaf0;padding:20px}table{border-collapse:collapse;width:100%;display:block;overflow:auto}td,th{border:1px solid #c7d2dd;padding:8px;text-align:left}img{max-width:100%;height:auto}.meta{color:#506171;font-size:14px}@media print{body{background:white}main{max-width:none;padding:0}nav{display:none}h2{break-after:avoid}a{color:inherit}}ReadmeQuickstartUser GuideTroubleshootingChangelogSlothMograph User Guide
Artist ownership of generated animation
Presets create ordinary Blender data. Image Density uses native Geometry Nodes and keyed Progress; its timing keys remain editable in the Dope Sheet and Graph Editor. Change key positions, interpolation and handles to tune timing and acceleration. Reapplying the timing tool deliberately regenerates its Progress keys, so preserve a copy of an authored take first. Path/order/easing configuration defines the motion; Progress, Stagger, Travel Amount, Lift Apex and Variation are native animatable scalar controls.
For procedural motion with continuous subframe playback, use Image Density > Preview & Delivery > Create Native Motion Copy. The copy has local native nodes and animatable custom properties and plays without the addon. For individual art direction, use Create Individual Clone Keys. It samples the scene frame range to one editable object per disc, preserves materials and the original cloner, and hides that original to avoid double rendering. The objects have native location, quaternion rotation, scale, color and size keys; source deformation uses native shape keys where supported. Move individual keys or use Blender NLA strips to change timing, repeat, speed and influence. The optional export costs storage and samples integer frames; shorten the scene range before generating. The efficient procedural cloner remains available for another take. Composed/multi-source geometry uses Studio Bake for Handoff and may need explicit geometry-sequence delivery.
Studio > Motion Layers > Apply / Update creates ordinary additive NLA strips while preserving the authored base Action. Detach to Editable Keys retains the last applied curves and removes only that layer's preset controls. Existing key edits, handles, curve modifiers, strip speed, timing, repeat and influence are preserved. Pending preset parameter edits require Apply / Update before detaching. The detached action is isolated from other objects sharing the generated action, and subsequent layers do not replace it. Continue in Blender's Graph Editor and NLA Editor. Shared Signals also provides Bake / Detach. These handovers preserve artist edits; the addon does not run a hidden evaluator on detached data.
Image Density: artist controls in 1.2.2
Create a mesh cloner from one disc and choose Image Density. Use the folder button beside Image A and Image B to import static maps. Import creates a separate image datablock and defaults to Non-Color, so a texture already used by a material is preserved. Turn Non-Color off in the import dialog when normal color decoding is intended. Existing images remain selectable in the dropdown. Static formats that Blender can decode are accepted; movies, sequences and UDIMs are rejected. Density weights use normalized 0-1 values; grade/bake HDR images first when their out-of-range intensity ratios matter. The decoded buffer must be finite and at most 16,777,216 pixels.
Set Count (1–10,000), choose a plane, hide the original source in renders if needed, and press Refresh Image Layouts. Brightness controls placement probability: white attracts more points and black attracts none. Images do not hide, shrink or delete clones. Without Image B, both endpoints use A's exact layout and interpretation, with the B Position offset.
Open Density & Placement and enable Separate A / B Settings. First enable copies shared settings, preserving existing layouts. Disabling restores shared settings; re-enabling restores separate edits. Each endpoint offers Size, Stretch/Fit/Fill-Crop, channel, inversion, black/white levels, density contrast, alpha multiplication, pixel jitter, seed, mirrors and map rotation. White Level must exceed Black Level. Levels apply before inversion, followed by contrast and optional alpha multiplication. Fit preserves aspect inside Size. Fill preserves aspect while cropping to Size, including fractional border-pixel weights. Rotation follows fitting and mirroring around the layout center; it can extend outside the unrotated Size box. A Position and B Position move the layouts in cloner-local 3D space.
Spatial pairing reduces travel using balanced partitions. Sample Order pairs weighted sample indices. Both retain A's IDs and use every B point once. Spatial pairing is deterministic; it does not solve optimal transport or collision avoidance. Min Spacing checks endpoint centers only. Infeasible spacing reports an error and retains complete previous geometry, rather than changing count or disc size. Refresh after pixel painting or image reload. Playback does not poll image pixels.
Open Motion & Travel. Progress moves the same clones from A at 0 to B at 1. Choose Linear, Smooth, Smoother, Sine, Cubic In or Cubic Out easing. Stagger spreads starts across Progress while ensuring every clone reaches B at 1. Order follows clone IDs, reverse IDs, X/Y/Z, center-out or a seeded shuffle; Reverse Order flips the cascade. Center-out uses distance from A's centroid. Motion Seed changes random ordering and travel variation without resampling either endpoint.
Choose Straight, Arc or Lift. Arc bends sideways relative to the travel direction and endpoint displacement; coincident/parallel endpoints use a stable perpendicular fallback. Lift rises and settles along the plane normal or a normalized custom axis. Travel Amount is signed and measured in local units. Lift Apex places the peak along eased travel. Travel Variation changes each clone's height or bend with a stable seed. Paths retain endpoint positions, count, identity and unit clone scale.
Progress, Stagger, Travel Amount, Lift Apex and Travel Variation can be animated. Path type, order, axis, easing and layout settings are structural: configure them between shots and Refresh. Gentle Morph, Directional Sweep, Center Bloom and Organic Arc provide editable starting styles while preserving images, materials and Progress keys. Explicit effectors and global scale controls can change size; leave them at their defaults for full-size discs.
Open Timeline & Holds to create forward, reverse or returning-loop Progress keys with endpoint holds and Linear or auto-clamped Bezier interpolation. This replaces only Progress keys and their curve modifiers; other channels remain intact, and shared actions are copied before editing. Existing Progress drivers or active NLA must be edited directly. The frame range must leave positive travel time after holds. Returning loops reach A before repeating.
Use the Graph Editor to refine acceleration, pauses and custom timing. Bezier timing combines with per-clone easing: choose Linear local easing when the Graph Editor should control all acceleration. Reverse Progress to return from B to A. Reversing Order changes cascade direction without changing A/B identity.
Open Preview & Delivery. Preview A/B generates an interpreted-density image in placement space, including levels, alpha, aspect, mirrors and rotation. Select the named result in Blender's Image Editor; refresh the preview after settings or pixel edits. Source images are preserved.
Suggest Source Spacing uses a conservative evaluated source bounding diameter, including source origin and cloner-relative transforms, plus Spacing Margin. It sets Min Spacing; Refresh then checks feasibility. It preserves Count, image Size and clone scale. Long/asymmetric/off-center sources may produce conservative suggestions much larger than a disc diameter. Travel can still cross or overlap.
Normal single-source Image Density evaluates its complete motion natively in Geometry Nodes. Progress playback, subframes and background rendering do not need layout resampling or a Python frame handler. Create Native Motion Copy duplicates the source mesh, materials, points, native nodes and action into a new collection. Standard Blender custom properties named sloth_image_* control the copy, which works without SlothMograph. The original stays editable: hide it when rendering the copy to avoid two arrays occupying the same space.
The native copy snapshots geometry rather than live source deformation. Material resources such as texture images remain Blender resources and must be packed/collected for portable delivery. The helper requires one native cloner modifier, one source, no enabled effectors/cache, no parent/constraints, and action keys rather than drivers/active NLA. Other animated addon properties require the existing Studio Bake for Handoff. That workflow has its own sampling/storage limits and should be checked in the receiving scene.
Enable motion blur and choose shutter settings in the render engine for the shot. Direct native playback and native copies retain subframes for Cycles motion blur. Use intentional cascade order, modest variation, endpoint holds and a camera that contains the travel. Lift is a composition control; Min Spacing and Lift do not guarantee collision-free motion. For shader-driven art, bake the desired static grayscale shader result to A/B images first: Image Density samples decoded pixels rather than arbitrary live shader graphs.
Native fields use single precision. Ordinary qualified motion uses a 0.0002-local-unit geometry tolerance. At the deliberately extreme combination of 95% stagger, 20-unit varied travel and 0.1 lift apex, the qualification permits at most 0.001 local unit deviation from the double-precision ideal. Count, identity, scale and endpoint checks retain their tighter contracts. Windows runtime qualification covers the exact Blender builds in the release report, not every OS or hardware configuration.
Retain the previous ZIP and a pre-update project copy. Disable the addon, install slothmograph_v1.2.2.zip under the same package identity and enable it. Existing 1.2.1 projects retain shared settings, zero stagger and straight travel by default. For rollback, reinstall the previous ZIP and reopen the pre-update project copy; the old version does not interpret the new artist controls.
Start here
Install the 1.2.2 ZIP from Blender Preferences > Add-ons > Install from Disk (Install in Blender 4.1). Open the 3D View sidebar with N and select SlothMograph. The qualification configurations on Windows are Blender 4.1.1, 4.2.3 LTS, 4.3.2, 4.4.0, 4.5.14 LTS and 5.0.1. Other builds and operating systems were not tested. Legacy addon installation starts at 4.1; Blender's extension system starts at 4.2.
Click Quickstart in Blender, or open Help & Getting Started, to read the packaged guides in Blender's Text Editor. Shift F5 returns that area to the 3D View. Guides require no internet connection or Markdown application. Reopening a guide reuses an unchanged copy and preserves copies you have edited. Hover controls for their tooltips; if Blender hides them, enable Tooltips in Preferences.
Use QUICKSTART.md for the first exercises. Use this guide to choose the right tool and understand what gets saved, updated or replaced. TROUBLESHOOTING.md covers common symptoms and recovery.
Understand what you are selecting
A source supplies the geometry. A cloner supplies its distribution and effector stack. An effector changes clone transforms or color. A field restricts an effector spatially. A Motion Studio result is a separate controller created from a reference cloner. A native handoff is generated output intended for delivery without the addon.
Most panels follow the active object, not every selected object. If expected controls disappear, select the cloner or controller in the Outliner. Selecting an individual generated piece is different from selecting the owner. The main panel lists the SlothMograph features on the active object.
Source and cloner transforms both affect the result. Establish a modest test layout before adding complex source modifiers or nesting generators. Keep reference objects available; Motion Studio leaves them visible initially, so hide the reference when comparing the generated result alone.
Choose a cloner distribution
Start with a selected non-empty mesh and click Cloner in the Create section. Keep the initial count small while testing a source.
- Grid: Per Step uses the specified gap between centers; Endpoint uses that value as the entire extent along each axis. Shell omits fully interior grid points. A one-clone axis stays centered. Brick Pattern offsets alternating rows by half a step.
- Linear: Count creates a centered line along a positive or negative axis. Segment includes both endpoints; a single clone uses its start point. Rotation and scale steps accumulate by clone index, and Growth changes the progression.
- Radial: choose XY, XZ or YZ, radius and angular range. Close Ring uses evenly spaced samples without duplicating the end angle; turning it off includes the end angle. Align to Circle points the source's local +X along the ring tangent in every plane. Height and Scale Step build spiral arrangements.
- Honeycomb: staggered rows use half an X step and the hexagonal row-height factor. Set equal X/Y spacing for regular hexagonal center spacing.
- Object: Vertices, Edge Centers and Face Centers give one clone per selected component type. Surface Random samples the complete triangulated mesh, weighted by world-space triangle area. Seed repeats the result. Minimum Distance checks final clone centers after random position jitter; dense requests can produce fewer clones when the bounded placement attempts are exhausted. Position jitter can move clones off the surface.
- Stack: choose an axis and Auto Size or a manual item size. Gap is added between the measured, randomly scaled items. Use a centered source with suitable orientation; this is dimension-based packing rather than a mesh collision solver.
- Cannon Ball: Square and Triangle use different layer counts. Base Count 3 creates 14 square-base clones or 10 triangle-base clones. Spacing sets horizontal and layer spacing; these are geometric pyramid arrangements, not a simulated pile of touching spheres.
- Projected Grid: casts down from Height onto the target mesh. Hits follow the surface and can align to its normal. A missed ray uses the unprojected grid position at Z=0, so inspect edge points and choose sufficient height.
- Curve: uses the first spline. Even Spacing follows distance along the curve; Step samples its parameter uniformly, which can give unequal distances; Knots uses the control points. Closed paths omit a duplicated end sample. Bezier and rational NURBS shapes are evaluated rather than treated as control polygons. Even Spacing uses a finite arc-length approximation, so extremely sharp or intricate curves can need inspection. Align directs local +Z along the tangent; Bank rolls around that tangent. +Z and +Y select a world up reference. World Z (Legacy) preserves the old NORMAL setting as a world-Z alias and does not read native curve tilt or normals.
- Blend: interpolates source and target mesh vertex positions in world space. Unequal vertex counts repeat the shorter list by index; this is not nearest-point matching. Rotation can interpolate their normals. A/B Layout Transition instead captures complete equal-count clone layouts.
- Volume: fills a suitable closed mesh using seeded random samples or a grid. Padding shrinks the world bounding region. A one-sample grid axis uses its center; unpadded grids consistently include surface samples. Excessive padding gives empty output. Open, self-intersecting or unsuitable geometry can make inside/outside tests ambiguous, and random filling has a bounded attempt count.
- Partition: recursively splits a rectangle in XY, XZ or YZ. Min Size limits further splits, so Splits is a maximum request. Scale to Rect divides by the source's local bounding dimensions to fit each rectangle. Use centered, suitably oriented source geometry; switching source dimensions changes the required per-clone scales.
- Beads: packs complete copies along each spline independently using the largest source dimension plus Gap. It supports Poly, Bezier and NURBS curves. Open paths keep the full measured bead length within the path ends. Loop wraps the offset around a closed path while retaining its packed count. Packing uses sampled arc length and bounding dimensions; it is not exact geometry collision prevention on tight bends. Local +Y follows the tangent. Bending the copies themselves is the separate Per-Clone Spline Wrap workflow.
Assigned empty mesh targets, invalid NURBS configurations, exhausted Beads paths and complete start/end trimming can legitimately produce zero clones. Clear the trim or correct the target to restore output. A missing target can instead show a preview grid or line while the setup is being configured.
This release corrects whole-polygon surface sampling, nonuniform-scale normals, Curve spacing and alignment, non-XY Radial alignment, Volume boundaries, Beads end/loop behavior and non-unit Partition scaling. Older scenes that depended on the previous behavior can look different. Preserve a copy of an established shot and compare it before rebaking caches or replacing its output.
Multi-source workflows select geometry from the configured sources. They do not turn lights, cameras or arbitrary dependency cycles into supported mesh sources. An initialized cloner still needs its required primary source; do not clear that pointer to make a collection-only setup.
Display percentage and proxy modes are working controls, not a promise that the final render silently restores full detail. Before rendering, inspect the intended Full Instance mode and 100% display count. Stable clone IDs help keep selection restrictions consistent while a subset is displayed.
Shape motion with effectors and fields
Select the owner, add an effector and begin with one transform channel at a modest value. Verify that it changes the clones before adding a field. Select the intended effector in the stack, add a field and move or resize that field to inspect its influence.
Random, Noise, Plain, Step and Time are useful starting points. Target-dependent effectors such as Look At, Target, Spline, Inheritance and ReEffector require their corresponding reference. Sound requires valid audio; Shader requires suitable image/input settings. Check these dependencies when an effector has no visible effect.
Field blend order and modifier order matter. Move or duplicate modifiers to experiment, or copy a stack and append it to another field. Stateful effects such as Delay, Decay and Freeze depend on evaluation history; play from the intended start when judging them. A stateless field mask used by Layout Transition is deliberately more restricted.
Studio Editing operates on projected clone centers, including centers behind other geometry. Shift adds, Ctrl subtracts and Escape cancels. It is not mesh-surface or depth-occlusion selection. Stepped or ambiguous point streams are rejected rather than mapped to unreliable IDs. Field diagnostics show sampled field values at displayed positions, not the final combined influence of every effector.
Effector and field reference
Use the effector's Enabled, Solo, Strength, transform-channel switches and selection restrictions to isolate its result. Add a field after the unmasked effect is working. Each of the following is a starting workflow, not a preset that suits every source scale.
For transform deltas, Multiply Delta calculates each component as before * (1 + weighted_delta). A starting position component of 2 with a fully weighted offset of 4 becomes 10; zero influence leaves it at 2. A zero starting component remains zero under multiplication, so use Add to move that component away from zero. The stored MUL setting is retained for existing files, but the previously broken multiplication behavior is corrected.
Local position offsets follow each clone's existing Euler axes and inherit the cloner's orientation and scale. For Grid, Linear, Radial and Stack, Global offsets use world-unit axes even when the cloner is rotated or nonuniformly scaled. This switch controls offset direction; it does not replace the individual field/reference sampling conventions or guarantee world-space matching for every transformed target combination.
- Random: set a repeatable Seed and modest position, rotation or scale ranges. Uniform uses the selected interval, Gaussian centers its variation within that interval, and Noise provides coherent variation. Enable the channels you intend to change; Uniform Scale keeps the axes together. Corrected Gaussian and Noise behavior can change an older setup that depended on the previous outputs.
- Step: add a progressively changing transform by clone index. Choose linear/discrete steps or a curve remap. Clone order determines the visible progression.
- Noise: use spatial noise for irregular motion. Scale changes the pattern size and Speed changes its evolution; zero speed freezes the pattern. Cell selects cellular noise rather than another label for the default noise basis.
- Plain: apply the same chosen transform offset to the influenced clones. Combine with a moving field for localized reveals.
- Time: generate looping transform offsets with per-clone timing. Relative offsets are fractions of the loop; Absolute offsets are frames. Timing respects the scene frame rate, including its base. It does not retime arbitrary source deformation; use Animated Clone Sequencer for sampled mesh playback.
- Sound: supply a decodable audio file, frequency band and transform strength. Begin with one visible channel such as Z position before adding several channels.
- Look At: assign a target object and choose the source mesh's forward and up axes. An asymmetric source makes orientation changes easier to inspect.
- Target: assign the target used to pull clone positions toward a point. Start with modest strength and inspect the result before adding falloff.
- Shader: choose an image and the transform channels it should drive. This is image-driven motion, separate from applying a material to the source mesh.
- Delay/Spring: smooth or overshoot evolving transforms with its delay model. Blend smooths without spring overshoot. State is kept per effector slot, and repeated evaluation of the same frame does not advance it again. Zero influence resets its stored contribution. Judge it during sequential playback from the intended start, not only isolated frame jumps.
- Push Apart: choose a collision radius suited to the clone spacing, then increase relaxation iterations only as needed. It can separate identical starting positions and respects its influence masks. Its radius-based separation is not exact mesh collision.
- Spline: assign a curve, set Start/End and Blend, then animate Scroll. Align to Tangent follows the curve direction using the selected forward axis.
- Inheritance: assign a source object and choose the inheritance mode and channels. Its source mapping differs from copying a second cloner's evaluated result.
-
Formula: start with the visual Wave, Spiral, Stairs or other patterns. Negative axes reverse the visual pattern amplitude. Custom expressions use
id,count, normalizedu/vand frame-valuedt; for example,sin(id * 0.5 + t * 0.1)varies across clones and frames. Invalid expressions return zero, so simplify a silent formula to a known expression when debugging. - Volume: assign a suitable closed mesh. Clones outside the volume and its boundary allowance are reduced to scale 0.001; Invert reverses the region. It does not delete those clone IDs or mask every earlier effector independently.
- Group: add existing effectors as members, then choose whether group strength overrides or multiplies member strengths. Members are applied through the group. Nested groups are not evaluated as recursive hierarchies.
- Visibility: choose Field, Index or Random visibility. Hidden clones are reduced to scale 0.001, not removed from the point stream; this matters for downstream clone IDs and extreme close-up shots.
- Magnet: assign a target and adjust the attraction radius and falloff. Snap to Surface uses the target mesh surface instead of its origin. Check scale and range when no clones are affected.
- ReEffector: assign a source cloner and select position, rotation and/or scale with Replace, Add or Lerp blending. It reads the source's generated point positions, rotations and scales. Position values follow that point stream's local coordinate convention; do not assume two differently transformed cloners will align in world space automatically. Avoid circular cloner dependencies.
The eleven field types provide different masks:
- Sphere, Box, Cylinder, Torus and Cone: choose a geometric region, then place and size it around the intended clones.
- Linear and Radial: use directional or center-out gradients for wipes and reveals.
- Noise: use a spatial noise mask for irregular patches.
- Object: assign a mesh for distance-based falloff.
- Spline: assign a curve for distance-based falloff along a path.
- Group (Constant): supplies a constant 1.0 before its modifiers and strength. It is not a nested field container; combine other entries through the flat stack's blend operations.
Field modifiers run in stack order. Remap, Clamp, Curve, Step, Quantize and Invert reshape values directly. Decay, Delay and Freeze retain evaluation history per element. Reset or replay that history when comparing revisions, and use the diagnostic display to inspect sampled field values before judging the complete effector stack.
Formula and L-system expressions
Expressions are a bounded scalar math language. Arithmetic, comparisons, conditional expressions, named numeric variables and the supplied math functions are supported. They do not execute Python statements, imports, attribute access, indexing, lists, comprehensions or lambdas. Use scalar arguments such as min(1, 2) rather than a list. Formula trigonometry uses radians; MoSpline L-system trigonometry uses degrees. Formula t is the frame, while L-system variables have their grammar-generation meanings.
Each expression is limited to 512 characters, 128 syntax nodes, 24 levels of nesting and 16 function arguments. Numeric intermediate values and results must be finite and no greater than 1e12 in magnitude; exponents must be between -64 and 64. An invalid or over-budget scalar expression evaluates to zero. Simplify a nonresponsive expression to a known example before adding complexity. L-system channel/image helper stubs do not provide general Houdini scene access.
L-system generation separately limits the premise to 16,384 characters, combined rule text to 65,536 characters, production rules to 256, expanded tokens and turtle points to 100,000 each, branch depth to 256 and rewrite/context work to two million steps. These are work limits, not a guaranteed memory footprint. An over-budget rebuild retains the last good curve and exposes an error; reduce generations, branching or rule size and rebuild. The inline grammar editor can ignore malformed lines without a production rule; file import is stricter, so check the grammar as well as the numeric expressions.
Choose an animation workflow
Animation Presets provides the existing 17 preset workflows. Studio Motion Layers provides four independently editable native NLA layer types: Float, Shake, Turntable and Pulse. Start with one layer, apply it, play the timeline, then add the next. Changes to Studio settings require Apply / Update. Inspect detailed blending and timing in Blender's NLA Editor. Keep complex pre-existing drivers and constraints under review when combining animation systems.
Shared Signals drives several numeric properties from one named source. For a first example, map an object's location, array index 2, to animate Z. Choose a modest amplitude, Apply / Update and inspect playback. Output is added to the existing property value. A negative gain or inversion reverses the response. Per-target phase is available for procedural waves; Audio uses its source-level start offset.
Object Data mappings address the object's data block. Material Nodes and Node Group mappings address their node trees. Blender's Copy Data Path command helps obtain socket or modifier paths. A numeric array property also needs the correct component index. A property name alone does not identify a shader socket. These advanced mappings require basic familiarity with Blender data paths.
Audio is analyzed when applying the signal. Use gain for strength, gate to suppress low values, attack/release to shape the envelope, and frequency limits to isolate part of the sound. Peak pulses produce a different response from a continuous envelope. An unavailable file is an error, not a valid silent result.
Bake / Detach retains generated native animation while removing its procedural binding. Removing a mapping removes its generated contribution instead. Full scene copies can update independently. Linked copies sharing the same animation host must make that host independent or edit the original binding; conflicting updates are rejected.
The separate right-click SlothSignal command creates a sampled native NLA action for its chosen numeric channel. This applies to Noise and Custom Noise as well as Sine, Bounce, Pulse and Saw. Noise and Custom Noise use the same fixed harmonic noise shape; Seed changes its repeatable variation. No Loop creates one Start/Duration window. Loop rounds the requested cycle count to whole cycles; Ping-Pong appends the reversed window. Repeating strips extend through the scene end when applied, with a maximum of 1,000 repetitions. Extend the scene range and click the entry's Refresh icon if more repetitions are needed. Removing a signal removes its owned contribution and retains the original user animation. Older modifier-based signals remain readable and migrate when refreshed.
For a SlothSignal field mask, choose the cloner as Field Owner. The zero-based Field Index counts every field across all of its effectors in stack order, starting with 0. Check the resolved field name in the panel, especially after reordering fields or effectors. A missing or disabled selection is reported. Field strength is included once in the sampled mask. Click Refresh after changing field or subject animation; these masks are sampled, not live field drivers. An animated mask whose endpoints do not close the loop is rejected; use No Loop or revise the mask.
Build a Motion Studio result
Layout Transition: Capture A from a single-source cloner, edit the reference without changing its source or clone count, then Capture B. Animate Progress between zero and one. Add easing and stagger only after checking both endpoints. Captures freeze the source geometry; changing the source afterward does not automatically recapture it. Use the reference-selection button when revising the target layout.
Animated Clone Sequencer: animate the source with fixed topology, choose a sampling range and create the sequence. The tool stores 2–240 mesh samples and enforces a memory budget. Phase, speed, reverse and playback modes select from those samples. Changing topology is rejected. Editing the source action afterward requires a new sampling pass. The result does not continuously rescrub the original source action for every clone.
Per-Clone Spline Wrap: choose a mesh and curve, then create the copies and adjust count, axis, spacing and offset. The native Curve modifier needs enough vertices along the bend direction; a low-resolution cube cannot make a smooth ribbon. Inspect source orientation and curve transforms if the result is displaced.
Use Duplicate Motion Rig for an independent result. After copying a controller with Blender's generic duplicate command, use Make Rig Independent before editing it. The controller's Remove action removes its generated result, not the reference cloner.
Text, generators, cameras and physics
MoText splits type into characters, words or lines. Edit text and fonts through its owner. Unambiguously matched parts retain materials, custom properties and animation. Simple location keys are rebased to the new rest layout. Ambiguous, removed or re-split parts are retained in a hidden archive. Drivers, constraints and complex NLA are preserved but may need an artist's review after a layout change. Archive recovery is described in Troubleshooting.
MoSpline builds procedural curves, including shape and growth workflows. Increase detail and L-System iterations gradually: branching rules can grow the geometry very quickly. Inspect tube thickness, trimming and build settings when a curve exists but renders unexpectedly.
Tracer builds trails or connections from the configured source. Its history-dependent modes need a suitable frame range and evaluation order. MoInstance produces repeated motion-history geometry. Select their owner to inspect settings rather than a generated child.
Fracture splits suitable meshes into pieces. The current Create PolyFX workflow creates a cloner that copies the whole source mesh at each of its polygon centers, with the regular effector stack; it is not a face-fragment extraction command. Older extracted-face PolyFX setups have their own legacy controls. MoExtrude changes face extrusion. Begin with a copy of a simple mesh and a modest piece/detail count. Open, self-intersecting or very dense geometry can require preparation. Keep the original available while evaluating the result.
Camera supplies Orbit, Crane, Dolly, Hero and Flythrough rigs. Inspect the active scene camera and its frame range after creation. Shot Framing Check reports sampled frames where evaluated subject bounds leave the safe area; it does not judge occlusion, focus, lighting or composition. Perspective and orthographic cameras are supported by that check; panoramic cameras are not.
Dynamics uses Blender's native rigid bodies and connectors. Collision geometry, object scale, simulation range and solver settings still determine the result. A simulation needs its own suitable bake and receiving-project check. Delay/Spring motion is a different mechanism from a rigid-body simulation.
Bake Dynamics to Keyframes samples the scene range, prepares native Actions, then detaches connectors before removing their rigid bodies. The bake requires local unparented bodies without object constraints, drivers, NLA tracks or nonidentity/animated delta transforms; these can reapply transforms to the world-space result. Unsupported setups are rejected before changing the rig. Limits are 10,001 frames and two million body-frames, not a guarantee of a particular RAM footprint. Shorten the range or split the delivery when necessary. Preserve a live-simulation copy before committing to native baked motion.
Reuse, freeze and deliver
Effector Stack Export/Import exchanges settings-only JSON presets. Import appends a validated stack to the active local, editable cloner, assigns unique names and remaps group members within the imported stack. Grouped presets need unique effector names so their references are unambiguous. It does not bundle object/datablock targets or external media: clear those dependencies for settings-only reuse, or use My Setups to preserve a supported complete setup. Invalid files are rejected before changing the existing stack. JSON uses schema 1; older files without a schema field are accepted when their settings remain valid. Limits are 4 MiB per file, 1–256 effectors, 0–256 entries in each nested collection, 4,096 settings groups and eight nested levels. Unknown properties, invalid options, duplicate JSON keys, mismatched vectors, non-finite/out-of-range values and nonempty file paths are rejected. Linked or overridden owners cannot receive an import.
L-system Rule Export/Import exchanges UTF-8 .lsys or .txt text, with optional premise=, angle=, step= and generations= headers followed by production rules. Lines beginning with # are comments; exported disabled rules use # [disabled]. Files are limited to 256 KiB and must contain valid production rules within the grammar and generation budgets above. Import requires a local, editable owner without a library override, and validates the grammar on a temporary curve before replacing the current rule settings. A validation or budget failure preserves the existing settings and curve; read the error before retrying. These preset formats contain settings and text, not executable Python.
My Setups stores the active root, all selected objects, supported dependencies and relevant current-scene Shared Signal controls in a native Blender library. Deselect unrelated objects before saving. The file browser accepts asset metadata. An appended setup receives independent bindings while retaining saved native animation. Replace Source supports initialized single-source cloners and validates dependencies before replacing the result.
Portable saving supports embeddable native image, font and sound IDs, but rejects unsupported raw external-file settings, including Shared Signal audio paths. A setup library is not a universal dependency packer. Keep external assets organized and read the error before retrying a failed save.
My Setups requires local dependencies and rejects linked-library data or library overrides during save and append, including references inside custom properties. Make the intended dependencies local in a working copy first. Append requires exactly one supported setup with an unambiguous root; a failed import removes its newly loaded data and retains the pre-existing scene. It appends data without opening the file as the main scene or enabling automatic Python execution. Blender's own script and driver trust settings still apply to native .blend assets; the addon does not promise to sanitize arbitrary files.
Persistent Cache stores evaluated transforms and colors, not a universal freeze of source geometry, material networks or external files. Bake and enable the cache before Save .smcache. Copy the saved file with the .blend. Save/Load records an absolute path: after a move, use Load .smcache at the new location or set Cache File to a Blender project-relative path such as //shot.smcache and save the project. Restore on Open uses the displayed path; editing that path does not load it immediately. Clear Cache clears in-memory samples; it does not delete the disk file or disable Restore on Open. Pure motion edits intentionally remain frozen until clear/rebake.
Cache storage is bounded to 10,001 frames, two million clone-frames and 256 MiB of uncompressed file data. Structural changes invalidate a cache, including source mode, stepped mode and ordered source identities. Older saved files without the current signature need rebaking. Iterate, Random and stepped cloners consume cached transforms/colors while source geometry and source/snapshot selection retain their live behavior. A failed bake or invalid import preserves the previous good samples.
Cache loading checks its schema, owner, structural signature, contiguous unique frame numbers, transform/color dimensions and finite numeric values before replacing the active samples. A zero-clone frame cannot be stored by the current cache/handoff transform contract; choose a range with valid clone output, or use Clone Rate to animate scale-based reveal while retaining the point stream.
Bake for Handoff samples the scene start/end range into a dedicated native output collection. Auto uses object transform/color keys and supported deformation for simple output; complex output can use frame meshes with stepped visibility. Explicit Geometry Sequence supports cases such as changing topology. Its limits are 1,001 frames and five million stored vertices. Successful reruns replace their own earlier output; failed targets retain their good output.
Review the handoff manifest and save a delivery copy. Pack or collect external textures, audio and other dependencies. Open and render that copy without the addon before handing it to another artist. Integer-frame playback is the contract; subframe motion blur and export to other applications may differ.
Single-source Image Density with no enabled effectors, stepped animation or transform cache plays its Progress animation natively in Geometry Nodes, including background Blender rendering with SlothMograph enabled. For other procedural configurations or a render farm without the addon, use verified native baked output. Legacy procedural frame handlers intentionally do not rebuild in background Blender because changing geometry there has caused native crashes. A live viewport setup or saved transform cache alone is not a qualified background-animation workflow. Bake for Handoff covers its supported cloner outputs; Bake / Detach retains Studio animation. Other procedural generators need a separately checked native bake/output path. Test the saved delivery scene before a long batch.
Support and qualification
The release evidence records the exact archive, tested Blender versions and covered scenarios. Automated registration, numeric and render checks do not establish that every possible scene or native mouse interaction works. Use the supplied demo and a representative production shot when qualifying the addon for your own pipeline.
For support, use Report a Bug or email [email protected]. Include versions, expected and actual behavior, reproduction steps and a minimal project without private assets. See TROUBLESHOOTING.md before removing generated data or changing an established production file.
L-System Artist Studio (1.2.2)
Create a MoSpline, choose L-System mode, and apply an Artist Studio starting point.The 24 starting points include broadleaf, sapling, pine, willow, blossom, orchard,shrub, fern, palm, ivy, hanging vine, bamboo, wildflower, sea fan, staghorn, antler,roots, veins, circuit, chandelier, fractal tower, snowflake, Hilbert and stochastic woodland.Every preset becomes editable production rules and normal Blender properties.Existing scenes keep their previous L-System interpretation until Studio is enabled.
Size calibrates the largest branch extent in object space. Branch Radius usesBlender units independently of Size. Split Taper changes thickness at each nestedbranch; Root to Tip Taper thins the structure along the distance from its origin.Minimum Radius Factor sets a floor relative to Branch Radius. Segment Detail addsintermediate points for wind bending. Smooth Branch Curves makes native Beziersplines; disable it for precise angular ornaments and circuits. Start Rotation andStart Position set the turtle's initial local transform; the object transform remains yours.Directional Attraction bends the forward direction toward your chosen vector.Randomness and Seed create reproducible angle and step variation.
Growth reveals branches continuously by distance from the root. Child branchesappear only once their attachment is reached. Zero produces no visible geometry.With placements, a small part of Growth is reserved for models to finish growingafter their stems arrive, controlled by Model Growth Duration. Trim Start and Endcut along root distance; trimming the base can intentionally detach branches.
Grammar commands: F(length,width) draws; G also draws; H draws half-length; f(length)moves without drawing. Width is a relative radius factor. Initial Width uses 0.05as factor 1. + / - turn about local Y, & / ^ pitch about X, / and backslash rollabout Z, | turns around, [ / ] save and restore a branch. Angles accept degrees.The quote / underscore commands multiply / divide step length; ! / ? set or scalewidth; ; / @ multiply / divide angle. $ resets roll, and % prunes the remainder ofthe current branch. J or L places a leaf, K a flower, M fruit. Terminal Tips canplace a chosen model on branch endpoints, independently or together with commands.Unexpanded alphabetic symbols are nonterminals and do not draw. Use whole rulegenerations for topology changes; animate Growth for a continuous reveal. Studiodoes not implement polygon, metaball or Houdini channel/image commands. The legacyinterpreter and its controls remain available with Studio disabled.
Supply a normal mesh object for any of the three model slots. The source meshdatablock and its materials are shared without changing the source object, mesh,transform or Action. Source modifiers and source object animation are not copied;apply them to a separate mesh if that evaluated shape is wanted. Models aligntheir local +Z axis to the branch; Model Rotation provides the artist offset.Length, Width, Curl and Petals shape the built-in meshes. Model Scale, rotation andsize variation also affect custom meshes. All new geometry controls are nativeanimatable RNA properties. Branch and built-in model materials are normal Blendermaterials. Wind uses amplitude, cycles/second, spatial frequency and a direction.The stem and attached models follow wind during native frame evaluation, includingbackground rendering. Enable Blender's Lock Interface when rendering while alsoediting a scene in the GUI.
Create Editable Growth Keys writes a normal object Action channel with two keys.Choose Start/End and linear or eased Bezier timing, then edit the keys/handles inthe Dope Sheet or Graph Editor. Existing Growth animation is protected unlessReplace Growth Keys is enabled. Other Action channels are preserved. Keyframe anyother Studio parameter directly with Blender's normal Insert Keyframe command.
Create Editable Curve + Mesh Copy retains the procedural source and creates anindependent ordinary curve plus mesh objects for the current frame. Edit theircontrol points, radii, vertices and materials without the addon. Bake NativeAnimated Mesh Copy samples the evaluated stems and models into ordinary meshframes with native constant visibility Actions. The sampling interval is FrameStep, with the endpoint always included. It preserves the source Action and frame.Hide the procedural source when rendering this copy to avoid overlapping output.Mesh sampling captures animated topology and wind; it does not interpolate meshvertices between samples. Frame Step 1 is appropriate for exact rendered frames.Bake limits: 240 samples and 3 million stored vertices; work beyond these limitsfails before committing the staged output. These mesh frames can be edited andtheir visibility keys retimed in Blender. The procedural source and Growth Actionremain available for continuous or subframe work.
Export/Import Studio Recipe stores the grammar, enabled rule slots, expressionvariables, geometry controls and timing settings in bounded JSON. Materials,object targets and Actions stay in Blender; use a .blend or My Setups for those.Import validates settings and the grammar before replacing output. Validate /Expanded Grammar creates a normal Text datablock showing the generated symbols.Malformed, nonfinite and over-budget input keeps the last successful geometryand reports the error in the panel. Branch/point/model limits are explicit andeditable; the engine also bounds rewrite work and nesting. Limits protect thescene but cannot guarantee a frame rate on every computer or with every mesh.
Leaf clusters and artist output details
Leaves per Cluster fans multiple leaf models from each leaf command or terminalleaf placement. Leaf Cluster Spread controls that fan angle. Clusters countagainst Placement Limit. Built-in flowers use curved petal surfaces and thePetals control changes their topology; all built-in models remain ordinary meshes.
Growth key generation isolates a shared or linked Action before editing it, soanother object that uses the previous Action keeps its keys. Existing Growthkeys are protected by default; Replace Growth Keys affects that channel only.
Generated placement slots remain paired with their mesh IDs. Changing models orrules retains inactive slots for reuse, while timeline scrubbing keeps activeobject IDs. Release Hidden Placement Cache removes inactive generated objectswith Undo. It keeps active objects, keyed generated objects and artist mesh data.
Native mesh animation copies preserve source UV layers, point/corner colorlayers, per-face smooth/flat shading and original material datablocks. Each sampleis one joined mesh object. Shaders that depend on individual Object Info orGenerated coordinates can change when objects are combined; use the proceduralscene or separate editable output for those shaders. Custom split normals andarbitrary non-color mesh attributes are not sampled by this handoff. Frame Step 1captures every whole rendered frame; subframe interpolation remains availablethrough the procedural Growth Action. See the supplied verification report fortested Blender builds and bounded runtime cases.
Troubleshooting
htmlSlothMograph 1.2.2 — TROUBLESHOOTINGbody{margin:0;background:#f4f6f8;color:#17212d;font:16px/1.65 system-ui,sans-serif}main{max-width:960px;margin:0 auto;padding:48px 24px 96px}nav{display:flex;gap:18px;flex-wrap:wrap;border-bottom:1px solid #ccd5df;padding:0 0 18px}a{color:#0057a6;cursor:pointer;text-underline-offset:3px}a:hover{color:#a83d10}a:active{color:#6b2468}a:focus-visible{outline:3px solid #0057a6;outline-offset:4px}h1,h2,h3{line-height:1.2;color:#071421}h1{font-size:38px}h2{margin-top:48px;border-top:1px solid #d1dbe4;padding-top:24px}code{background:#e4eaf0;padding:2px 5px;border-radius:3px}pre{overflow:auto;background:#e4eaf0;padding:20px}table{border-collapse:collapse;width:100%;display:block;overflow:auto}td,th{border:1px solid #c7d2dd;padding:8px;text-align:left}img{max-width:100%;height:auto}.meta{color:#506171;font-size:14px}@media print{body{background:white}main{max-width:none;padding:0}nav{display:none}h2{break-after:avoid}a{color:inherit}}ReadmeQuickstartUser GuideTroubleshootingChangelogSlothMograph Troubleshooting
Trace On and closed curves
Trace On keys Blender's native curve trim. Native trim does not reveal a closed cyclic spline. Open the spline in Curve Edit Mode before applying Trace On, or use another object animation preset when you want to retain a closed loop. The original curve remains editable; the addon does not silently change its closure.
Open the guides from SlothMograph > Help & Getting Started. They load into Blender's Text Editor. Press Shift F5 to return to the 3D View. Reopening help preserves any earlier help copy you edited.
Artist image motion
Separate B settings have no effect. Assign Image B; empty B intentionally reuses A's settings and layout.
Density becomes empty after Fill/Crop or levels. Positive pixels may lie outside the crop. Check White Level > Black Level, channel, inversion and alpha, then Preview and Refresh.
The sweep feels abrupt. Reduce Stagger, choose Smooth/Smoother/Sine, add holds or refine Progress in the Graph Editor. Bezier Progress and local easing combine.
Spacing suggestion is too large. It uses a conservative bounding sphere, including source origin and relative transforms. Off-center/long sources may need manual spacing. Travel paths can cross.
Preview is old. Preview is an explicit snapshot. Run Preview A/B again and select the result in the Image Editor.
Native copy is rejected. Refresh valid images first. The helper requires one native modifier, no effectors/cache/parent/constraints and action keys without drivers/active NLA. Other animated addon properties need Studio Bake for Handoff. Hide the original when rendering its copy.
Tiny differences at extreme motion settings. Native fields use single precision. The qualified extreme allows at most 0.001 local-unit deviation from double-precision ideal motion; count, identity, scale and endpoint checks retain tighter bounds.
Controls and setup
The sidebar or expected panel is missing. Enable the addon, open the 3D View sidebar with N and choose SlothMograph. Select the owner/controller in the Outliner; many panels depend on the active object. The Text Editor is a different area type from the 3D View.
A button is disabled. Hover it for the context requirement. Create Cloner needs a non-empty mesh. Studio actions need their selected owner, layer, signal or target. Saving a disk cache needs a baked and enabled valid cache. Do not infer that a disabled action is a broken installation.
Tooltips do not appear. Check Blender's Tooltips preference. The addon supplies descriptions through Blender's standard tooltip system; it does not force your global interface preferences.
A control changed but the animation did not. Studio Motion Layers and Shared Signals use explicit Apply / Update. A cloner cache can intentionally freeze transform/color motion even while values are edited. Clear or rebake that cache. Sequencer snapshots and layout captures need recapturing after changes to their sampled source geometry.
I see doubled or overlapping output. Check whether the Motion Studio reference and result are both visible, or whether a handoff output overlaps its live cloner. Hide the intended reference/live output when viewing only the generated result. Preserve them until the comparison is complete.
Clone counts or IDs look unusual. Check display percentage, proxy mode and the distribution's individual counts. Studio Editing selects displayed clone centers through geometry. It does not select hidden surface polygons. Stepped/ambiguous point streams are rejected where unique selection IDs cannot be established.
Fields, shaders and motion
An older distribution looks different after updating. Surface Random now covers entire polygons and weights their world-space area, so the same seed can give a different corrected layout. Curve Even Spacing follows distance rather than control-point parameters, Radial tangent alignment now works in XZ/YZ, and Partition fits non-unit source dimensions. Compare the saved previous shot before rebaking caches. Choose Curve Step when parameter spacing is intentional.
The cloner produces no geometry. Check complete Start/End trimming, an assigned empty mesh, invalid NURBS order/point settings, Volume padding and Beads path length. These conditions now produce genuinely empty output instead of a phantom clone at the origin. Correct the input or restore the range. A missing target may show a preview grid or line until one is assigned.
Curve alignment or bead spacing looks unexpected. Curve aligns local +Z, Beads aligns local +Y, and Radial aligns local +X along the ring. Bank rolls Curve clones around the tangent. World Z (Legacy) does not use native curve tilt. Even Spacing and Beads use sampled arc length; bounding-dimension packing is not exact mesh collision avoidance on tight turns. Keep centered source geometry, inspect scale and leave additional gap where the shape needs it.
A projected point remains at Z=0. Its downward ray missed the target. Increase projection height or move/resize the target so the ray crosses it. Misses intentionally retain the flat grid position.
Surface or Volume creates fewer clones than requested. A minimum-distance constraint or a small/complex interior may exhaust the bounded sampling attempts. Reduce the requested count or spacing, increase the usable region, and check that a Volume target is a suitable closed mesh. Surface position jitter can leave the mesh, but Minimum Distance applies to the final centers.
Field diagnostics show no samples. Select an effector on the active cloner and enable the relevant diagnostics. Samples describe that field at displayed positions. They are not the final combined result of every effect in the stack.
An effector does nothing. Test it without a field first, then check strength, target/source references, selection restrictions and weights. Check whether a cache is active. Stateful effects may need playback from the intended start rather than arbitrary jumps through the timeline.
Random or Time looks different after updating. Gaussian and coherent Noise now use their intended distributions. Time Relative offsets are loop fractions, while Absolute offsets are frames, with the scene's frame-rate base respected. Compare an older saved shot and recheck its ranges before replacing a bake.
Multiply Delta does not move a component away from zero. Its rule is before * (1 + weighted_delta). Multiplying a zero starting component keeps zero. Use Add for a direct offset, or choose a nonzero base when multiplication is intended. Zero strength or mask influence leaves the original value unchanged.
An offset follows the wrong direction. Local follows each clone's orientation and inherits the cloner's transforms. Global uses world-unit position offsets for Grid, Linear, Radial and Stack. Inspect the source orientation with an asymmetric mesh. Field and reference sampling have their own coordinate conventions; changing offset space does not retarget every dependency.
A Formula or L-system expression produces zero. Use the supplied scalar variables and named math functions. Python imports, attributes, lists, indexing and lambdas are unsupported. Expressions are limited to 512 characters, 128 syntax nodes, 24 nesting levels, 16 function arguments, finite values up to 1e12 in magnitude and exponents between -64 and 64. Formula trigonometry uses radians; L-system trigonometry uses degrees. Start with sin(id * 0.5) for Formula or sin(30) for an L-system numeric expression.
An L-system retains its old shape and reports a budget error. The last good curve is preserved when the new generation exceeds its limits. Reduce premise/rule size, generations, branching or context complexity, then rebuild. The User Guide lists the text, rule, token, point, nesting and work limits. Do not interpret the retained curve as confirmation that the rejected grammar was applied.
ReEffector does not align two cloners in world space. Its source positions come from the generated point stream's local coordinates. Rotation and scale channels are read from that same stream. Match the intended coordinate setup or choose another explicit transform workflow; this is not automatic world-space matching between arbitrary transformed cloners.
PolyFX creates whole-object copies instead of face fragments. The current Create PolyFX button makes an Object/Face Centers cloner using the whole source mesh. Use that workflow for face-driven cloning. It does not invoke the older extracted-face PolyFX implementation.
Clone colors are black or do not vary. Apply a cloner color material and verify the effector's color settings. For old materials, select the cloner and use Legacy Clone Shaders > Repair Legacy Clone Shaders when shown. Repair creates independent material and nested-group copies. Shaders that read clone geometry attributes may require realized geometry; Render Instances handles this automatically for the supported attribute reads.
A Shared Signal target is invalid. Check the target kind, actual datablock, Blender data path and array index. Location Z uses location and index 2 on an Object target. A shader socket requires its full node-tree property path. Not every Blender property is numeric or animatable.
The Shared Signal changes the wrong amount. Output is additive to the property's starting value. Inspect gain, offset and inversion for that mapping. Per-target procedural phase does not retime Audio; Audio uses its source-level start offset. Apply / Update after editing.
A right-click SlothSignal stops or its field mask is stale. New and refreshed signals use sampled native NLA animation. No Loop has one Start/Duration window. Loop and Ping-Pong extend to the scene end set when applied, within the 1,000-repeat limit. Extend the scene range and click its Refresh icon if needed. Field and subject animation are sampled on application; Refresh after editing either. Field Owner is a cloner and Field Index counts every field across all its effectors from 0. Reordering can change the indexed target, so verify the resolved field name. Missing or disabled masks are reported. A nonclosing animated mask is rejected in Loop mode; use No Loop or revise its endpoints.
Audio looks flat or reports a decode error. Confirm the file is available and supported, then check the sampled range, frequency band, gate and gain. Missing audio should not be treated as a successful silent animation. Raw audio file paths are not automatically packed by My Setups.
A copied scene cannot update a signal. Linked copies can share the same animation host and binding. Make the host independent or edit the original binding. Full independent scene copies can fork their bindings on Apply / Update. This guard prevents one scene from silently overwriting another scene's animation.
A layout capture is rejected. A and B require the same source and clone count. Select the reference to edit its layout, then recapture B. Stateless field masks are supported; stateful history effects are not interchangeable with a deterministic transition mask.
The sequencer reports changing topology or a memory limit. Use shape keys or another fixed-topology deformation. Reduce the sample range, increase its step or simplify the source. Samples are frozen meshes saved inside the project, not a continuously resampled source action.
Spline-wrapped copies look rigid or displaced. Add enough source subdivisions along the bend direction. Check the chosen axis, source orientation, curve, spacing and transforms. The native Curve modifier cannot create curvature between vertices that do not exist.
Text and recovery
Old letters remain in the Outliner after a text edit. MoText intentionally archives unmatched or ambiguous parts and split-mode replacements. Locate the archive collection and inspect its contents in a copy of the project. Temporarily enable the collection/object visibility to compare an old part or recover its material/action. The archive is not an automatically merged replacement for the current text layout.
Preserved text animation needs adjustment. Simple location curves are rebased, but complex constraints, drivers and NLA are retained and flagged for review. Check the status message and compare the new rest positions. Repeated letters or words can be ambiguous; preserving the wrong animation silently would be worse than retaining the old part in the archive.
A duplicated Motion Studio controller is locked. Use Duplicate Motion Rig for a new independent rig. If it came from Blender's generic duplicate command, select it and use Make Rig Independent before editing.
Caches, assets and handoff
An Effector Stack JSON import is rejected. Use a supported settings-only preset within the 4 MiB and 256-effector limits. Unknown settings, invalid enum/vector values, duplicate keys, non-finite numbers, datablock targets or external paths are rejected. Use My Setups when the reusable setup needs supported object dependencies. A successful import appends to the current stack and remaps its internal group members; invalid files leave the previous stack intact.
An L-system rule import is rejected. Check the 256 KiB file limit, valid numeric headers, at least one valid production rule, and the grammar/generation budgets in USER_GUIDE. Invalid text is not silently installed over the previous rule slots. Import tests the grammar on a temporary curve and preserves the old settings and curve when validation or generation exceeds its limits.
Bake Dynamics rejects a body. The bake records world-space simulation. Parenting, object constraints, drivers, NLA tracks or nonidentity/animated delta transforms could apply again to that result, so these setups are rejected unchanged. Resolve them in a project copy or use a separately validated native Blender bake workflow. Also check the limits of 10,001 frames and two million body-frames. A reported incomplete restoration needs inspection of the retained bodies and Actions before retrying.
Save .smcache is disabled. Bake and enable a valid cache on the selected initialized cloner. A stale structural signature or disabled cache is not eligible for saving. The status row describes the active cache separately from the last disk operation.
A cache reappears after reopening despite Clear Cache. Clear Cache removes current in-memory samples. Turn off Restore Saved Cache on Open if the saved disk file should not load next time. Clearing does not delete that file.
The cache is beside a moved project but cannot be restored. Save/Load records an absolute path. Load .smcache from the new location, or change Cache File to a project-relative path such as //shot.smcache and save the .blend. Copying files does not rewrite an old absolute reference.
A cache load is rejected. Check owner identity, cloner structure, file availability and storage limits. A wrong or malformed file leaves the existing good cache intact. Rebake when the source structure or clone layout contract has changed. Older saved files lacking the current source-mode/source-list signature also need rebaking. Cache files store transforms/colors, not every geometry or shading dependency; source deformation and source/snapshot selection remain live.
My Setups reports an external path. The setup includes an unsupported dependency, such as a raw audio setting, sequence or another external-media path. Pack supported native image/font/sound IDs, remove the unsupported dependency from the saved setup, or keep that project as a full scene with its files collected separately. Do not assume the error means all assets were successfully embedded.
My Setups reports linked data, an override or an invalid root. Save and append require local dependencies and exactly one supported setup root. Make intended linked data local in a copy, resolve overrides or choose a file produced by Save My Setup. References hidden inside custom properties are also checked. A rejected append removes only its newly loaded data and restores the previous active scene selection; it does not authorize scripts or drivers from arbitrary files.
Replace Source is rejected. It requires an initialized single-source cloner and usable replacement geometry. Empty geometry and dependency cycles are rejected before replacing the previous result. Keep the old source until the replacement has been inspected.
A handoff fails or is too large. Read the report: shorten the frame range, simplify geometry, or choose the appropriate output mode. Native geometry sequences trade storage for compatibility. A failed target preserves its prior good output; successful targets may still complete in a multi-cloner bake, so inspect the report and manifest for partial success.
A cache or transform handoff rejects a zero-clone frame. The current stored transform contract requires at least one clone in each sampled frame. Avoid fully trimmed or empty distributions in that range. Clone Rate can reveal clones through scale while keeping the underlying point stream available for sampling.
The receiving project looks different. Check integer frame number, active camera, visibility, source/live duplicates, color management, engine and external assets. Render a saved copy without the addon. A native handoff does not guarantee identical subframe motion blur or export to another DCC.
A command-line or render-farm job shows frozen procedural motion. Legacy frame handlers skip background Blender for crash safety. Export verified native baked output before submitting the job; a transform cache by itself does not remove that handler requirement. Use Bake for Handoff for supported cloners, or Bake / Detach for Studio animation, and verify other generators through their own native-output workflow. Test the saved delivery scene without the addon.
Report a reproducible issue
Use Report a Bug, or email [email protected]. Include the Blender and addon versions, operating system, render engine, exact steps, expected behavior, actual behavior and a minimal .blend without private assets. State whether the issue occurs after reopening and whether a cache is active. Keep a copy before cleanup so the original failure remains inspectable.
Automated qualification covers the published test matrix, not every possible production scene, native UI gesture, hardware configuration or operating system. Do not use an unqualified claim of universal real-time performance or complete Cinema 4D parity as a production assumption.
Have questions about this product?
Login to message
| Blender Extension Compatible | Yes |
| Published | 6 months ago |
| Blender Version | 4.1 - 5.0 |
| Extension Type | Add-on |
| Render Engine Used | Cycles, Eevee |
| License | GPL |
Discover more products like this
mospline effector cinema 4d 3DMotionGraphics cloner motext motion graphics non-destructive procedural mograph animation fracture